In the season of Spring and sprucing up social media accounts, it could be the perfect time to try out a feature or two that you haven’t yet. How about Instagram Stories Highlights?
Trust me, I hear you that this is one more feature on social media to learn, and it’s tough to know where to best spend your time. While there’s only basic analytic data surrounding the performance of these Highlights, I’ve seen some incredibly creative and strategic uses of them in my own social media exploring. From tutorials, to whimsical “about us” sections and behind-the-scenes sneak peeks, this small feature actually packs a huge punch of opportunities. With that being said, the creativity does take some planning and cultivating to curate the feel and flow that you’re looking for.
Before we dive in, if you’re thinking “whoa, whoa, whoa, this is too complicated, or I need more info,” let me know! I can create an “Instagram Stories Basics” post to ease in, so comment below, or send me a note here–I personally see them all. (Here are some other Instagram features to check out, including a few more details about Instagram Stories.)
Where do you find these Highlights?
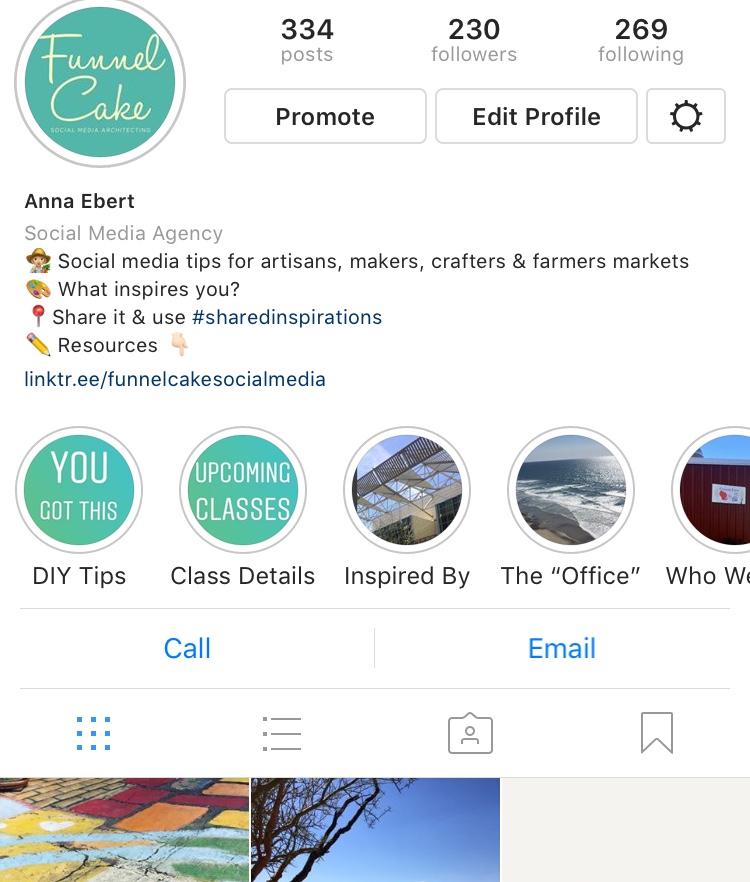
See the circles in this example below that say things like “Inspired By” and “The Office”? Those are what you’re looking for. If you haven’t created any yet, you’ll see a blank area with a drop-down menu that will populate. Don’t worry: If you haven’t created any yet, the public won’t see a blank space there–only you do!
Creating an Instagram Stories Highlight
Ready to dive in? Here’s how to create your first Highlight.
Remember: You can’t just use any photo or video. It must be one that’s currently or previously been an Instagram Story and then saved to your archive. So, think of it this way: Photo or video from your camera roll or taken directly in Instagram –> Can be used as an Instagram Story –> That Story can then be saved to your archive (and then added to your Instagram Stories Highlights later).
Stories Archive: To turn on this feature so that future Instagram Stories save to your Archive for later use (or for historical purposes), click on the gear icon on the right side of your Instagram profile. Select “Story Settings.” On the next screen, turn on “Save to Archive.” You can also update other settings in that area. For example, I like my Stories to also save to my camera roll, but that’s just me!
Adding More Content to an Existing Instagram Stories Highlight
Hooray–you have one (or many) Highlights started. Even better: You have awesome new content that you’d like to add to keep them updated and fresh. Here’s one way to do it.
Updating an Instagram Stories Highlight Cover
Whether you’re conflicted on an image, or you just want to test another option’s performance, changing your Highlights’ cover appearance is easy!
A few tips I’ve found so far:
- Prominent on Mobile: Right now, Instagram Stories Highlights are consistently available on the app. However, depending on which Internet browser I use, they sometimes populate on desktop, too. In this view, the covers are a bit off kilter, and you can see more than four at a time.
- Chronological order: As of right now, all Instagram Highlights and the content they contain are ordered chronologically, and this can’t be manipulated. For example, the order of the Instagram Highlights on your profile fluctuates as you update a particular Highlight. So, if you want something front and center, you’ll need to constantly update that Highlight to keep it in its place. The same goes for content within a Highlight.
- Highlight title:
- The character limit is brief before it cuts off, so being concise is key.
- It will briefly display in white in the center when you click on a Highlight. This can’t be removed or edited.

- Cover photos: For images or text, you can create them in Canva using the Stories setting. You’ll then upload as a Story and crop when you set it as the cover to zoom in on the image or text you would like centered. Additionally, if you aren’t as particular about font and color selection, you can also use Instagram Stories’ “Type” mode to create text-based covers. I’ve also used this method to create headers between sections in a highlight, such as when I’m introducing a tip.


